Electricity and Circuits Activity Explanation Class 6 Chapter 12
Activity 1
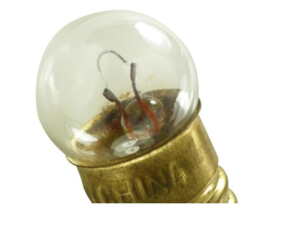
Brief procedure: Activity 1 asks us to look into a filament bulb and observe what we see.
Observation:
We see a thin spiral filament. This filament is connected and supported by ywo thick wires.

A bulb glows when current passes through its filament. The two thick wires provide support and connectivity to the filament. Once we close the switch (switch on) the circuit between the bulb and the cell ( battery) complets. As a result the bulb start glowing.
Activity 2
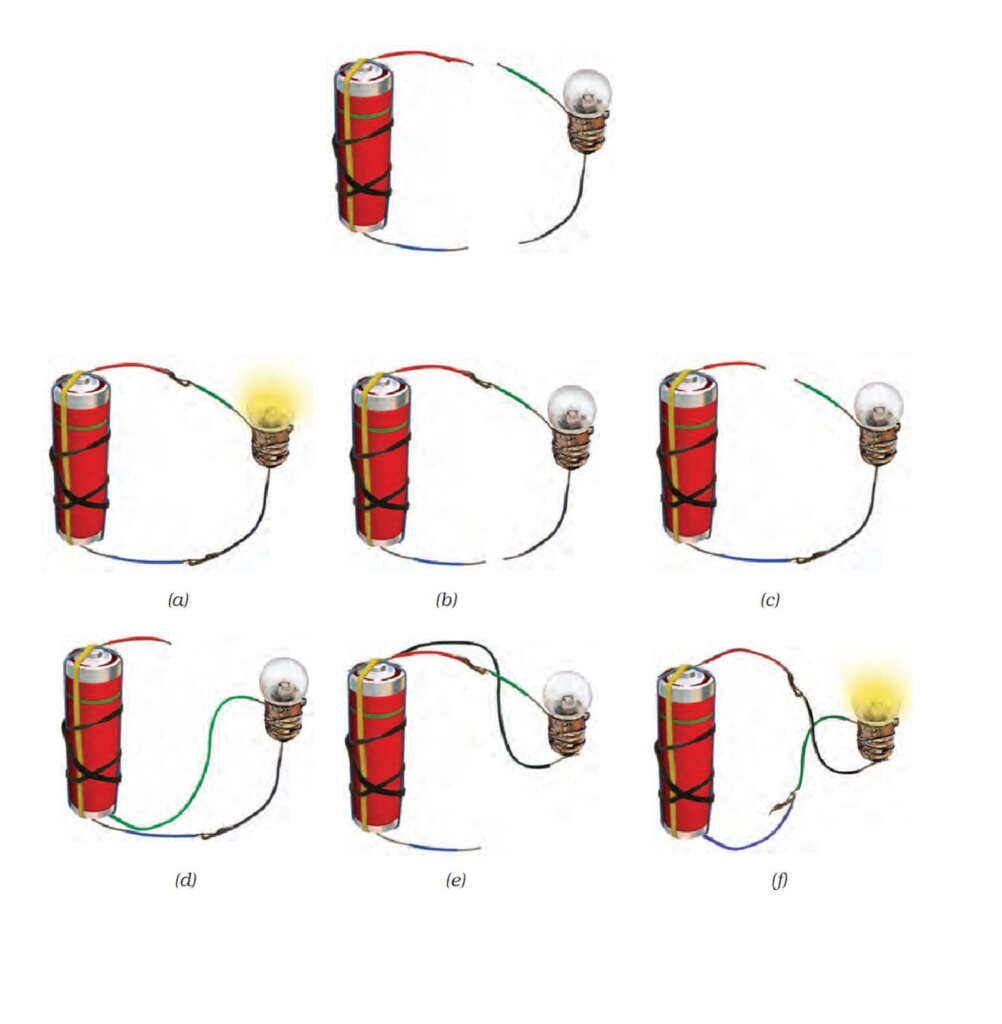
Activity 2 asks us to connect a bulb to the cell as shown in figure and check if the blub glows in various situations.

Observation:
In situtation (a) and (f ) the blub glows.
Explantion:
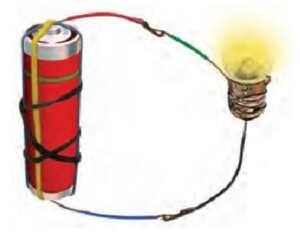

A bulb glows when current flows through it. This is possible when circuit is competed. T
hat is when positive terminal of the cell is connected to one of the terminal of the bulb and the negitive terminal of cell (flat disc) is connected to the another terminal of the bulb.
In fig b and c the circuit is open so bulb can not glow.
In fig d and e both the terminals of the bulb connect to the same terminal of the cell while the other terminal is open.
Activity 3
Activity 3 asks us to arrage bulb and the cell as shown in the picture and observe when we bring the bulb terminal to the cell and when we sepaerate the bulb from the cell.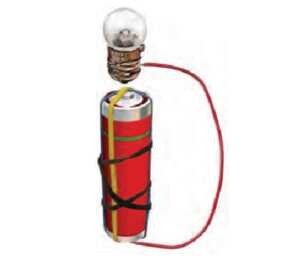

Observation:
When we bring the bulb terminal to the cell the blub start glowing. while, when we separte the bulb from the cell the bulb stop glowing.
Explantion:
The above situation is similar to activity 2. The only difference is we use lesser wire and directly connect the bulb terminal with the cell.
In first cases the circuit is complete and the bulb start glowing. While in the second case the circuit is incomplete. As a result the bulb stop glowing.
Activity 4
Activity 4 asks us to make aa switch from two drawing pins and a safety pin.
Procedure:
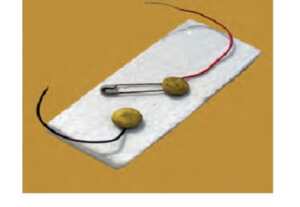

Observation:
When we connect the safety pin with the drawing pin the bulb glows and when we remove away the safety pin from one of the drawing pin the bulb stop glowing.
Explanation:
As discussed in earlier activities a bulb glows when the ciruit is completed. Drawing pin and safety pin are conductor of electricty. When the safety pin touches both thedrawing pin, it make the circuit complete. As a result the bulb start glowing.
Activity 5
Activity 5 ask us to use various materials instead of safety pin as done in activity 4 and check if the bulb glows or not.
Explanation:
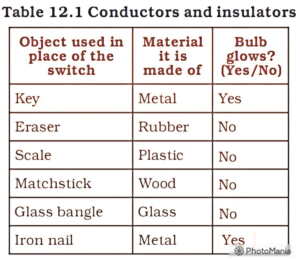

Some material let ectricty pass through it. They are called conductors of lectricty. Examples are metals, water, human body,
Some materials donot let current pass through it. They are non cinductors. Examples are materials made of wood, plastics, wool, rubber etc.
See also:

